Technology
Empowered Prosthetic ingenuity and innovative thinking has produced a new generation of highly durable and inexpensive bionics. We redesigned the traditional manufacturing process by creating a way to make personalized, 3D-printed limbs using a simple, three-step process. First, the arm is scanned precisely using an XBOX Kinect. The laser-light technology of the scan ensures that even minuscule details are accurately depicted. The scan is made in to a file that can be read by the Makerbot to print. These simple steps have significantly cut down production costs and time.
Components of Assembly

The process begins with developing a scan of the opposite limb of an amputee in order to create a proportionate mold of the arm. This can be done at the Empowered Prosthetics lab, or at home. The laser-light technology of the Kinect ensures a precise copy will be scanned.

The Makerbot interprets the scanned file and begins forming the prosthetic limb. This 3D-printing process significantly reduces the amount of time usually spent in manufacturing a prosthetic. Our method is also environmentally friendly, as we use recycled material to build our products. In the case of an error, we place the faulty print into a reactor so it can be reused for future printing.

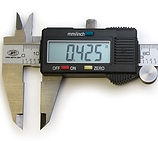
To further ensure precision, the caliper is used to measure the 3D printed products, screws, and other components essential for putting together the prosthetic limb.

Once the hollow mold of the limb is printed, the technical components are added. The servo motors located within the prosthetic are able to spin slowly and in different directions, emulating the speed and motion of real fingers. They allow the fingers to contract individually or all together.

The Myoware muscle sensor is an Arduino-powered electromyography sensor. The Myoware works by measuring the electrical activity of a muscle and then outputs 0-5 Volts depending on the activity in the muscle. You can directly attach biomedical sensor pads to the board instead of worrying about cables.

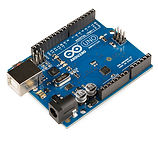
The Arduino is the central processing unit of the robotic prosthetic. It interprets signals sent by the sensors, controls the voltage and amp power, and tells the sensor how often to pick up signals from the arm.

The breadboard is basically a construction foundation for prototyping electronics. We are using solderless breadboards because they are reusable and are easier to create temporary prototypes with.

An oscilloscope allows for careful observation of differing signal voltages, and is usually displayed on a 2-D plot of signals as a function of time.

A function generator makes different types of electrical waveforms over a wide range of frequencies. We are using function generators to develop and test the EMG devices because they have analog circuits.

The NI Elvis II is an engineering lab workstation that includes everything a practicing engineer needs. It has an oscilloscope, digital multimeter, function generator, variable power supply, Bode analyzer, and other lab instruments as well. You can also connect this workstation to a PC and build circuits that way.

We use 3M Red Dot electrodes as a connection from the circuitry to the arm of the amputee that will be acted upon by the electric current. 3M Red Dot electrode has been clinically proven to have a five-day wear time and is very comfortable for amputees because of its foam backing.
